Opening Windows to a Wider World

Opening Windows to a Wider World

这个广告词我觉得写得不错,如前述,在FreeBSD下频繁的读写ext3分区有导致分区dirty的可能,所以我把接入磁盘阵列的操作系统换成了Centos5.5,使用LiveCD灌到U盘,然后通过VNC,局域网网络安装,没有图形界面,速度很快,十几分钟就欧了,这台笔记本配置很低,一枚VIA的800Mhz处理器,2G内存,80G硬盘,我最中意它的是因为它作为一台笔记本,是没有风扇的~大大减少了物理损坏的可能。装好Centos,yum了一个samba3x上去,mount上磁盘阵列,修改好配置文件,发现总是启动failed,我英明的查看了一下samba日志,然后上网搜了搜~

[2011/04/01 15:28:20,  0] smbd/server.c:main(1275)
smbd version 3.3.8-0.52.el5_5.2 started.
Copyright Andrew Tridgell and the Samba Team 1992-2009
[2011/04/01 15:28:20,  0] lib/messages_local.c:messaging_tdb_init(96)
ERROR: Failed to initialise messages database: Permission denied
[2011/04/01 15:28:20,  0] lib/messages.c:messaging_init(204)
messaging_tdb_init failed: NT_STATUS_ACCESS_DENIED

搜索的结果是,出现这些个错误的原因林林种种,什么数据库错误,编码问题,但很明显都不是我要的结果,就在我准备放弃的时候,我看见有人在其它的问题上抱怨SElinux……电光火石间,我意识到了这个问题。

究其根本,是因为以前在安装Centos服务器的时候,考虑到使用Oracle数据库的可能,都装上了图形界面,而且我习惯性的在装好之后把SElinux和iptables都禁用掉,这次只安装了命令行,木有安装图形界面,于是,SElinux和iptables都在那运行着……找到了问题,解决起来就很简单,把SElinux直接disable掉(/etc/sysconfig/selinux),然后chkconfig iptables off,chkconfig ip6tables off,reboot。

终于可以顺利的启动Samba服务,接下来进行配置,参考原来mybookworld中的配置文件,简单的说呢就是,有一些目录大家可读可写,有一些目录大家可读不可写,有一些目录大家不可读不可写,有一些目录我可读可写,嗯,还没晕的话说明你逻辑思维能力很强。

smb.conf配置如下:

[global]
server string = MyBookWorld Version %v
netbios name = mybookworld
workgroup = WORKGROUP
interfaces=192.168.151.5/24 127.0.0.1/8
security=user
smb passwd file=/etc/samba/smbusers
guest account=www
log file=/var/log/log.%m
max log size=50
dns proxy=No
unix charset = utf8
lock directory=/var/lock
pid directory=/var/lock
use sendfile=Yes
map to guest = Bad User
create mask = 755
map hidden = Yes

[dummy-1]
include=/etc/samba/shares.inc

其中,包含了一个配置文件,shares.inc,这个文件中含有所有的共享目录设置,配置如下:

[PRIVATE]
path=/shares/PRIVATE
force user=www
valid users=kenbaby
write list=kenbaby

[MOVIE]
path=/shares/MOVIE
force user=www
guest ok=Yes
valid users=kenbaby www
write list=kenbaby
read list=www

[PUBLIC]
path=/shares/PUBLIC
force user=www
valid users=www kenbaby
write list=www kenbaby
guest ok=Yes

这个配置文件很简单,英文过了四级的都能看懂,第一个PRIVATE目录,只允许kenbaby进行读写,写入的文件权限赋给www用户,第二个MOVIE目录,所有用户都可以读取,但只有kenbaby可以写入,同样,写入的文件权限赋给www用户,第三个目录PUBLIC,所有的用户都可以进行读写。将写入的文件权限赋给www用户,很好的保证了文件在磁盘上的权限统一在一个用户下,前面的smb.conf配置文件中,已经将www用户指定为来宾用户,也就是说,在Windows PC访问共享的时候,默认的Guest用户就能够直接访问,不用输入用户名和密码了。

最后一步,添加系统用户和samba用户,首先是添加系统用户:

groupadd www
useradd www -g www
groupadd kenbaby
useradd kenbaby -g kenbaby

系统用户无需初始化密码,这样它们也无法通过shell登入操作系统。然后我们添加samba用户,由于www用户是指定的来宾帐户,不需要设置密码,我们只需要为kenbaby用户添加密码即可。

smbpasswd -La kenbaby

添加完成后,重新启动smb服务即可访问共享啦!当然,如果要使用netbios name,还需要启动nmbd服务(/etc/init.d/nmbd restart)
CentOS下安装Openvpn(含VPS)

前提:VPS已经打开tun/tap,装有iptables,openssl及openssl-devel,现在很多VPS尽量简化,编译器可能会需要安装gcc。

1,下载LZO和OpenVPN。
wget http://www.oberhumer.com/opensource/lzo … .04.tar.gz
wget http://openvpn.net/release/openvpn-2.1_rc22.tar.gz

2,安装,都使用默认路径,
./configure && make && make install
即可。

3,拷贝文件,初始化PKI。
cp -r /root/src/openvpn-2.1_rc22/easy-rsa/ /etc/openvpn/
cd /etc/openvpn/2.0/
export D=`pwd`
export KEY_CONFIG=$D/openssl.cnf
export KEY_DIR=$D/keys
export KEY_SIZE=1024
export KEY_COUNTRY=US
export KEY_PROVINCE=FL
export KEY_CITY=Taipei
export KEY_ORG=”Sun”
export KEY_EMAIL=”[email protected]
. /vars

4,创建CA。

./clean-all
./build-ca

5,签发服务器证书和客户端证书。
./build-key-server server
./build-key client1

6,生成Diffie Hellman。
./build-dh
若不能执行,则 openssl dhparam -out ./keys/dh1024.pem 1024

证书生成完毕,可以把keys目录打包下载到本地以供客户端使用,下面进行openvpn服务器配置,

7,修改配置文件,如需使用代理连接,例如穿过中国移动CMWAP网关,配置文件中应使用tcp proto。
mkdir /etc/openvpn/2.0/conf
cd /etc/openvpn/2.0/conf && vi server.conf
——
port 1194
proto udp
dev tun
ca /etc/openvpn/2.0/keys/ca.crt
cert /etc/openvpn/2.0/keys/server.crt
key /etc/openvpn/2.0/keys/server.key置
dh /etc/openvpn/2.0/keys/dh1024.pem
server 10.8.0.0 255.255.255.0
ifconfig-pool-persist ipp.txt
push “redirect-gateway def1 bypass-dhcp”
push “dhcp-option DNS 10.8.0.1″
push “dhcp-option DNS 8.8.8.8″
client-to-client
keepalive 10 120
comp-lzo
user nobody
group nobody
persist-key
persist-tun
status openvpn-status.log
verb 3
——

8,启动openvpn.
/usr/local/sbin/openvpn –config /etc/openvpn/2.0/conf/server.conf

9,设置iptables nat,下面的环节,独立主机和OpenVZ会有一些区别,但区别不大,下为独立主机例,OpenVZ需要把eth0替换成venet0。

独立主机一般输入
iptables -t nat -A POSTROUTING -s 10.8.0.0/24 -o eth0 -j MASQUERADE
即可,部分OpenVZ VPS需要执行
iptables -t nat -A POSTROUTING -s 10.8.0.0/255.255.255.0 -j SNAT –to-source x.x.x.x
其中x.x.x.x是VPS的IP地址。
保存防火墙配置:
/etc/init.d/iptables save
/etc/init.d/iptables restart

10,设置转发参数。
检查当前参数:sysctl -a | grep forward
对比下列参数,若有为0的项目,使用
sysctl -w net.ipv4.ip_forward=1
类似命令修改。
——
net.ipv4.conf.tun0.mc_forwarding = 0
net.ipv4.conf.tun0.forwarding = 1
net.ipv4.conf.eth0.mc_forwarding = 0
net.ipv4.conf.eth0.forwarding = 1
net.ipv4.conf.virbr0.mc_forwarding = 0
net.ipv4.conf.virbr0.forwarding = 1
net.ipv4.conf.lo.mc_forwarding = 0
net.ipv4.conf.lo.forwarding = 1
net.ipv4.conf.default.mc_forwarding = 0
net.ipv4.conf.default.forwarding = 1
net.ipv4.conf.all.mc_forwarding = 0
net.ipv4.conf.all.forwarding = 1
net.ipv4.ip_forward = 1
——

11,服务端设置已经完成,客户端配置文件如下,其中,x.x.x.x是服务器对外的服务IP地址,ca.crt,client1.crt,client1.key是之前在服务器上生成的服务器证书,客户端证书和客户端密钥。
——
client
dev tun
proto udp
remote x.x.x.x 1194
resolv-retry infinite
nobind
persist-key
persist-tun
ca ca.crt
cert client1.crt
key client1.key
ns-cert-type server
comp-lzo
verb 3
redirect-gateway def1
——

FreeBSD下配置ADSL共享上网

利用FreeBSD用户级的PPP做FreeBSD下的ADSL共享上网,可以使用较低的设备配置,实现局域网的稳定的网络链路共享。同时还可以增加Squid做上网的代理,进一步增加局域网上网的速度。

FreeBSD可以对PPP提供两种不同方式的支持,一种是内核级PPP,它将PPP协议代码编译进内核,并运行一个PPP守护进程pppd,提供对PPP的支持,这是比较传统的方法,但配置比较困难。另一种为用户级PPP,使用一个应用程序PPP,通过通用tunnel设备传递PPP数据,配置较为容易。一般情况下可以使用用户级的PPP来建立拨号方式的Internet连接。

准备

安装基本的FreeBSD环境。然后确认在/etc/ppp目录中是否存在ppp.conf 或者ppp.conf.sample文件。

安装设置

要让整个局域网上的用户都可以访问 Internet ,您的机器必须有两张网卡,一张连接ADSL设备,一张连接局域网的HUB或者交换机。此外,重新编译一次内核是必须的,因为我们需要在内核中加入对IP转发的支持,客户机将IP数据包发到FreeBSD,然后FreeBSD作为网关,将这些数据包转发到指定的地址,这就是整个局域网上网的基本原理。

实例

视ADSL Modem只是一个拨号器,它不带任何附加功能(如路由)。使用FreeBSD自带的ppp来达到PPPoE拨号功能,实现最基本的目的:供内部网络中所有客户机通过FreeBSD网关用nat方式(透明网关)连接到Internet,这种方式最大的好处是内部网络的客户机不需特殊配置就能连接到外部网络。

一、服务器IP设定:

第一块网卡
IP:192.168.1.1
子网掩码:255.255.255.0
网关:NONE

第二块网卡
IP:192.168.2.1
子网掩码:255.255.255.0
网关:NONE

二、设置一个使用PPPoE的ppp呼出

将/etc/ppp/ppp.conf进行备份,以下是修改后的ppp.conf内容(除标签名为,以下每行前面都必须空一格):

default:
set device PPPoE:eth0 #eth01为连接ADSL Modem的网卡名称,应替换成你使用的设备名
enable dns #自动获取DNS
adsl: #标签名,可任意命名
set mru 1492
set mtu 1492
set authname myadslusername #ADSL用户名
set authkey myadslpassword #ADSL密码
set dial
set login
add default HISADDR

以上只有三处需要进行修改,即连接ADSL Modem的网卡名称、上网用户名上密码。如果你不知道自己的网卡名称,可以通过ifconfig -a命令得到。

三、设置启动时自动连接

将下面这些行加到/etc/rc.conf文件中:

getway_enable=”YES”

ppp_enable=”YES”
ppp_mode=”ddial” #断线重拨
ppp_profile=”adsl” #这里的adsl对应的是/etc/ppp/ppp.conf中的标签名
ppp_nat=”YES”

如果你想手动连接,则可以通过以下命令实现:

ppp -nat -ddial adsl

这样,FreeBSD网关服务器端已经设置完成,设置客户端的网关为192.168.1.1即可上网,如果需要自动分配IP地址,可另行安装dhcpd,如果需要进行网络的加速,可另行安装squid。

Minicom的配置和使用

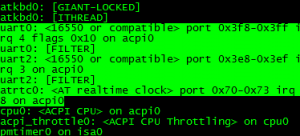
Minicom是一款类unix操作系统下串口通讯工具,功能和超级终端,或者说putty的COM通信类似,我们可以用它来配置通信modem,思科产品,以及其它需要串口通信配置的硬件,以下以FreeBSD为例,首先我们看下系统里面有没有串口信息,如果有以下的信息呢就代表串口硬件是存在的,正常~下图中的机器是有两个串口,一个uart0,一个uart2。

接下来我们安装minicom软件,这种常用软件直接用ports安装就可以了,make install,第一次运行我们需要初始化配置文件,使用参数启动:minicom -s

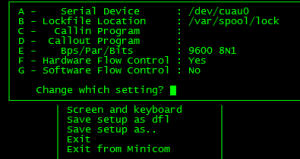
可以看到,最重要的配置自然是设备和端口了~我们稍加配置即可,需要说明的是,在FreeBSD中,虽然内核中的设备名称是uart0和uart2,但实际的设备名称分为呼出和呼入设备,呼出设备为cuau,呼入设备就是我们熟悉的tty了,在以Linux为内核的操作系统中,设备就不是这样命名的鸟……例如上面我们说到的uart0和uart2,对应的call out device分别是cuau0和cuau2,所以我们设置如图:(通信速率显然也需要设置一下)

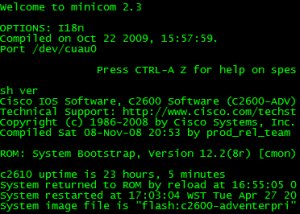
由于Minicom本意是设计为modem通信使用的,所以在modem & dialing设置项中有很多的初始化设置,如果不需要的话,可以把它们删掉~最后当然是Save setup as default,以后就不用每次更改设置了,设置完成之后exit,就进入了通信界面,我们可以sh ver一下。

二十四口思科c2950交换机

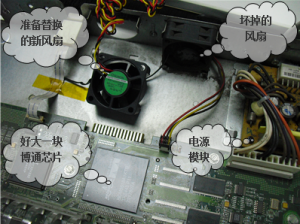
网上买了一只二手的二十四口铁盒子2950交换机,成色还不错,拆开看了下(太好拆了,我本来以为会很难拆的),出厂日期是二零零六年,线路板完好,电源模块成色也很新,就是灰尘多了点,风扇声音巨~~~大,看样子风扇是快要坏了,相当幸运的是,这个风扇的型号和以前公司遗留下来的服务器风扇一模一样,于是我很简单的就把新的风扇换了上去,运作顺畅,清理了一下灰尘,嗯,这一转手卖个七八百应该不成问题,接下来就是升级交换机的操作系统,也就是著名的IOS(Internetwork Operating System),铁盒子公司一直声称他们是卖软件的,我觉得好像也是,交换机里面的芯片不是英特尔就是博通,接口不是安普就是欧姆龙,除了铁盒子外面写了个cisco systems,就木有哪里有标志了。


下面我们来升级2950的IOS,准备工作:在我得电脑上开启tftpd服务,下载最新版本的2950IOS。

铁盒子屁股上写了个出厂IOS版本号EA1B,登录进去系统看看,果然是c2950-i6q4l2-mz.121-22.EA1b.Bin,说明这个铁盒子从来没有升级过,首先我们需要备份一下原来的IOS,万一升级失败了也好恢复,在CLI里面命令如下:

copy flash:/c2950-i6q4l2-mz.121-22.EA1b.Bin tftp

然后输入你电脑的IP地址就可以了,在几十秒钟后,电脑上tftpd的目录就可以看到传输过来的旧版IOS了。

如果配置文件中加了很多选项,那么最好也备份下config.Txt,步骤雷同。
接下来删除html管理器的目录,如果你不需要通过http来进行管理的话,也是要删除的,因为要删除了才能不通过它来管理嘛,如果不删除,那就是旧版本的html管理器配上新版本的IOS,那可不一定会发生什么神奇的事情,在CLI里面命令如下:

delete /r flash:/html

然后确认就可以了。

接下来检查一下剩余的flash空间,一般来说2950交换机的flash空间都比较小,只有八个MB,而新的IOS最小也有四个MB,我下载带加密功能的新版IOS(c2950-i6k2l2q4-tar.121-22.EA13.tar)有五点六个MB,所以,我们必须要删除原有IOS才能安装新的IOS,你看像现在新的2960交换机,flash有两百五十六个MB,可以放好多个不同的IOS哦~那么,删除旧版IOS的命令如下:

delete flash:/c2950-i6q4l2-mz.121-22.EA1b.Bin

到这一步,你就千万不能断电了,要是断电了,嘿嘿,哈哈,该贝斯。
接下来我们把新的IOS通过tftp协议传输到交换机上,例如我开启tftpd电脑的IP地址是192.168.1.99,然后在CLI里面命令如下:

archive tar /xtract tftp://192.168.1.99/c2950-i6k2l2q4-tar.121-22.EA13.tar flash:

接下来交换机会解压缩tar包,将bin文件放到根目录,将html管理器解压缩到根目录,直到重新出现#号提示符,IOS升级完成,然后我们需要重启一下交换机,看是否真正升级成功,在命令行下输入reload即可。

再次登录进入交换机,我们输入命令查看一下系统版本信息,可以看到,操作系统已经成功升级为Version 12.1(22)EA13带cryptographic功能的IOS。

c2950>sh ver
Cisco Internetwork Operating System Software
IOS ™ C2950 Software (C2950-I6K2L2Q4-M), Version 12.1(22)EA13, RELEASE SOFTWARE (fc2)
Technical Support: http://www.cisco.com/techsupport
Copyright (c) 1986-2009 by cisco Systems, Inc.
Compiled Fri 27-Feb-09 22:20 by amvarma
Image text-base: 0×80010000, data-base: 0×80680000

ROM: Bootstrap program is C2950 boot loader

c2950 uptime is 3 hours, 44 minutes
System returned to ROM by power-on
System restarted at 11:31:18 Taipei Wed Apr 14 2010
System image file is “flash:/c2950-i6k2l2q4-mz.121-22.EA13.bin”

This product contains cryptographic features and is subject to United
States and local country laws governing import, export, transfer and
use. Delivery of Cisco cryptographic products does not imply
third-party authority to import, export, distribute or use encryption.
Importers, exporters, distributors and users are responsible for
compliance with U.S. and local country laws. By using this product you
agree to comply with applicable laws and regulations. If you are unable
to comply with U.S. and local laws, return this product immediately.

A summary of U.S. laws governing Cisco cryptographic products may be found at:
http://www.cisco.com/wwl/export/crypto/tool/stqrg.html

If you require further assistance please contact us by sending email to
[email protected].

cisco WS-C2950-24 (RC32300) processor (revision R0) with 19912K bytes of memory.
Processor board ID FOC0903T099
Last reset from system-reset
Running Standard Image
24 FastEthernet/IEEE 802.3 interface(s)

32K bytes of flash-simulated non-volatile configuration memory.
Base ethernet MAC Address: 00:13:1A:50:2B:00
Motherboard assembly number: 73-5781-13
Power supply part number: 34-0965-01
Motherboard serial number: FOC0902454E
Power supply serial number: DAB0851NHZ0
Model revision number: R0
Motherboard revision number: A0
Model number: WS-C2950-24
System serial number: FOC0903T099
Configuration register is 0xF

总的来说,铁盒子的效率比TP-LINK这样的家用产品要高,一百个MB的网络,传输速度一度可以达到20M/s,完全不符合规律。

Cisco Switch Portfast

我早就发现了局域网自动分配地址的速度很慢,只是问题不够明显。虽然问题不明显,但我一直在思考这个问题,经过我英明的分析和搜索,原来这个问题是早有案例的……

Using PortFast and Other Commands to Fix Workstation Startup Connectivity Delays
http://www.cisco.com/en/US/products/hw/switches/ps700/products_tech_note09186a00800b1500.shtml#cnf2k

—高科技分隔线—
Introduction
This document addresses initial connectivity delays that occur when workstations that are connected to switches have one of these two issues:
*Unable to log in to a network domain, either Microsoft Windows NT or Novell
*Unable to obtain a DHCP address
The steps in this document are easy to implement and address the most common causes of workstation connectivity delays that you encounter during the workstation initialization/startup phase.
—高科技分隔线—

Spanning Tree
If you have recently migrated from a hub environment to a switch environment, startup connectivity delays can appear because a switch works much differently than a hub. A switch provides connectivity at the data link layer, not at the physical layer. The switch uses a bridging algorithm in order to decide if packets that are received on a port need to be transmitted out other ports. The bridging algorithm is susceptible to physical loops in the network topology. Because of this susceptibility to loops, switches run the protocol STP that causes loops to be eliminated in the topology. When you run STP, all ports that are included in the spanning tree process become active much slower than they otherwise become active as STP detects and blocks loops. A bridged network that has physical loops, without STP, breaks. Despite the time that the process involves, STP is beneficial. STP that runs on Catalyst switches is an industry-standard specification (IEEE 802.1D).

After a port on the switch has linked and joined the bridge group, STP runs on that port. A port that runs STP can be in one of five states:

*blocking
*listening
*learning
*forwarding
*disabled

STP dictates that the port starts out blocking, and then immediately moves through the listening and learning phases. By default, the port spends approximately 15 seconds listening and 15 seconds learning. During the listening state, the switch tries to determine where the port fits in the spanning tree topology. The switch especially wants to know whether this port is part of a physical loop. If the port is part of a loop, the port can be chosen to go into blocking mode. The blocking mode means that the port does not send or receive user data in order to eliminate loops. If the port is not part of a loop, the port proceeds to the learning state, in which the port learns which MAC addresses live off this port. This entire STP initialization process takes about 30 seconds.

If you connect a workstation or a server with a single NIC card or an IP phone to a switch port, the connection cannot create a physical loop. These connections are considered leaf nodes. There is no reason to make the workstation wait 30 seconds while the switch checks for loops if the workstation cannot cause a loop. Cisco added the PortFast or fast-start feature. With this feature, the STP for this port assumes that the port is not part of a loop and immediately moves to the forwarding state and does not go through the blocking, listening, or learning states. This command does not turn STP off. This command makes STP skip a few initial steps (unnecessary steps, in this circumstance) on the selected port.
—高科技分隔线—

用中文来说,上面这一段话可以解读为:处于OSI二层的STP协议定义了一个交换机的端口的五种状态,你看上面有blocking,listening,learning,forwarding,disabled这么些状态,显然只有forwarding状态才是工作状态,而一个交换机端口从加电开始,先要经过listening,learning,forwarding这么个顺序来启动,主要是为了检测端口上有木有环路,以免造成网络风暴而致堵塞,看看需不需要blocking。

遗憾的是,这每个过程至少需要十五秒的时间,于是就造成了dhcp超时,以致于电脑获取不到IP地址,而电脑重启之后问题就解决了,是因为这个端口已经进入了forwarding状态,那莫这个问题应该怎么来解决呢?

这篇文档中说到,Cisco added the PortFast or fast-start feature,思科添加了一个portfast功能,跳过listening,learning,直接进入forwarding状态。

那莫,如何开启portfast呢?这就太简单了,如图所示:

conf t
interface fastEthernet 0/1
spanning-tree portfast

那莫,为什么原有的STP协议中没有把这么方便的一个功能加进去呢?看上面那么大一段Warning就知道了~啊,原来是loops的后果很坏很严重……开启了portfast的端口只能接一个网络设备,也就是说,在开启了portfast得端口上,如果出现了环路,哇,居然可以network cannot recover,不过对于我们这种小型办公网络而言,最多也就是个网速超慢……总之呢,就是开启了portfast的端口,是不能接交换机,路由器,集线器等等设备的,也就是说,只能有一个NIC,一个MAC地址(当然是同时)。

—还是高科技分隔线—
Caution: Never use the PortFast feature on switch ports that connect to other switches, hubs, or routers. These connections can cause physical loops, and spanning tree must go through the full initialization procedure in these situations. A spanning tree loop can bring your network down. If you turn on PortFast for a port that is part of a physical loop, there can be a window of time when packets are continuously forwarded (and can even multiply) in such a way that the network cannot recover.
—还是高科技分隔线—

这篇文档居然还无聊地对端口up时间做了个benchmark(请参考原文中Timing Tests on the Catalyst 2900XL段落),结果是可以把三十秒的时间缩短为一秒……效果还是很明显的,等于是把网线插入电脑就可以上网了,零等待~

于是我把办公室那个交换机的portfast功能也打开了,明天上班看下效果……当然,连服务器和无线AP以及上行防火墙的端口显然是不能打开的……


单点故障的可能

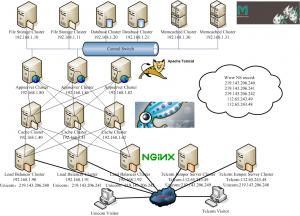
上次说到使用Memcached来存储session,这样就可以不用Tomcat的session同步机制(因为Y这么多年居然一点没变化过),直接做http的负载均衡,前端不管用硬件还是软件实现,系统结构都会显得更为简单,但是一直觉得,依然存在单点故障的可能,想想还是画个图比较清晰,画了几遍,如果除去Cache Cluster,那么木有单点故障的最小结构至少需要服务器十台,当然,我画的是理想化状态,Memcached的logo真TM恐怖……这样的结构,应该不会再有单点故障的可能,而且扩展起来也是很方便的,堆服务器就是了。

FreeBSD & Broadcom Netlink Ethernet Driver

近日在戴尔的机器Optiplex380上装Freebsd的时候发现,又是Broadcom的网卡,每次都是Y出问题,官方根本就不带驱动的~搜索了一下,在论坛上居然有解决方案:

https://forums.freebsd.org/showthread.php?t=6081

但支持的芯片组是BCM5761,BCM5784,BCM5785,并没有Optiplex380上的BCM57780,因为57780和5784,5785是一个系列的,根据我英明的估计和大胆的猜测,把patch文件打开看了一下:

http://nccs.christian.net/bge_bcm5784_patch.htm

里面果然有关于57780的字段,

接下来的事情就很简单了,用优盘把两个patch文件拷到电脑上,

Mount -t msdosfs /dev/da0s1

打patch,重新编译内核,reboot,OK~

cd /usr/src/sys/dev/bge
patch < /root/patchbge.patch
cd /usr/src/sys/dev/mii
patch < /root/patchmii.Patch
cd /usr/src/sys/i386/conf/
config kernel